
Vanilla is a cute little bantam hen. Vanilla decided she wanted to be a mother. She REALLY wanted to be a mother badly in fact. Vanilla was sitting on a clutch of almost 20 eggs, mostly standard sized hen eggs. She happened to be hogging the only nest box.
I was not sure how this would all play out but I have always wanted to see the natural process of a broody hen hatching eggs. So I did all I could to facilitate Vanilla's motherly desires. I placed a box with hay in the coop as an extra nest box to help my other ladies get by. They were not impressed. Some ladies took their egg laying business elsewhere; leaving me short of eggs. Other slightly less polite hens would push Vanilla out of the nest. To add insult to injury once in the nest they were destroying and eating eggs. This may have been a blessing in disguise since in reality Vanilla only should have had about 6 standard eggs under her.
I had decided at this point to candle the eggs to see which seemed viable. All seemed to have development. I figured if they other hens continued to be a bother I would move Vanilla and her unborn brood elsewhere but I had to figure out where.
Sadly the next day when I opened the coop door out popped Vanilla to dust bathe. She never looked back. The egg eaters were in the nest so I shooed them away and collected the eggs. I kept the eggs warm under the fan of my dehydrator while I did my research and bought supplies to make the following homemade incubator.
What you need:
Foam cooler (the hardest item to find)
Battery operated digital thermometer with temperature and humidity reading (don't forget batteries)
Small extension cord
Small light socket with electric plug end
Light Bulb (mine is a 40 watt appliance bulb)
Duct tape
Rubber Dish Mat
Tray to fit inside cooler (I used an old cake pan)
Sponge
Small dish
Glass from picture frame


I purchased the electrical items from a hardware store, the cooler was found at a drug store, the rest of the items are from Dollar Tree or salvaged from home. The thermometer was the most expensive purchase but even if we just tossed this incubator (we won't!) we could use the thermometer so it is not a total waste.
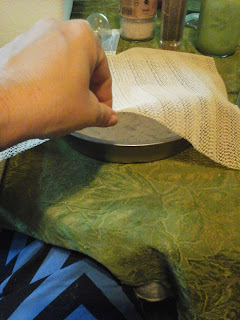
1. Wrap dish mat around your pan and secure using plenty of duct tape. This will be a little hammock for your eggs. You can put water in the pan to help with humidity.


2. Measure and cut hole for the bulb socket. Be careful, I cut mine too large and needed to tape a strip of the rubber mat around it to make it secure. You could also use glue (school glue NOT super glue it will eat the foam) to secure the bulb. I did not find it necessary to glue it in. Install your bulb.


3. Figure out how your pan will fit inside and insert it. Mine was larger than the bottom so it is jammed down into the container in a way that it is secure in the middle of the cooler. This is great because heat rises. If your pan fits on the bottom that is great too.


4. Tape your thermometer to the inside of your cooler securely. Plan where your window will be so that you can see the thermometer without the light blinding you or having to open the lid more than needed.


5. Place your container where you will keep it for the next 3 weeks or however long you still need to incubate your eggs. Plug in your light to test.
6. Place a sponge in a small dish full of water to help with humidity levels. Mine is placed on top of an old tea cup to put it closer to the light bulb.
7. I made my window in the cover of my cooler because of the tray being up high. I used a broken piece of glass from a frame. If your tray is on the bottom of the cooler you will want to cut and tape in your window BEFORE installing your thermometer, placing your pan, etc.


8. Now you can add your eggs to the tray and turn on the light. I have the letter A (side A) on each egg. This lets me keep track of what way to turn my eggs.


How it worked
I found that keeping the lid closed all the way was too hot. You will want your incubator to stay around 100 degrees and your humidity should be around 50% at least. I tried making air holes to keep the temp down but it did not help. On hotter days I need to keep it open more than cooler nights.
I am having trouble keeping the humidity level up because of the cover being open. I have kept a spray bottle of water near the container. I spray the eggs and inside the container (not near the bulb!) as often as possible. I am thinking I might try putting some plastic wrap over the open part. I think the plastic food wrap will allow heat to escape but moisture to stay in.
Sadly a couple nights into this experiment we had a 5 hour power outage. When the power came back on it was only 65 degrees in the incubator. I am not sure if the eggs can stay viable that long being that cool. I plan to candle the eggs this weekend and see what they look like. I will keep the eggs going and see what happens regardless.
No comments:
Post a Comment